WordPress SEO: Security Connection With HTTPS
How to

We start a series of posts on step-by-step technical optimization of new WordPress websites for beginners and webmasters. These articles will help you lay solid SEO foundation for further website promotion.
Let’s start with setting up secure connection and getting acquainted with .htaccess.
1. Why Is It So Important to Switch to HTTPS?
You might be wondering: ‘Why do I need HTTPS?’, ‘What does it have to do with SEO?’ and ‘Why do we start with it?'.
Here is why:
- The HTTPS protocol protects user data from interception and fraud. This is particularly relevant for websites which provide online transactions.
- After switching to HTTPS, the ‘insecure connection’ icon will be replaced by a green bar indicating that your website is safe. For example, now Google Chrome displays websites with HTTP as insecure and will focus users’ attention on this aspect.
- The HTTPS protocol is also one of Google ranking factors. It has been observed that ‘safe’ websites have priority in search results. Under equal conditions, of course.
- A lot of errors can occur during switching to HTTPS. So the sooner you do it, the better.
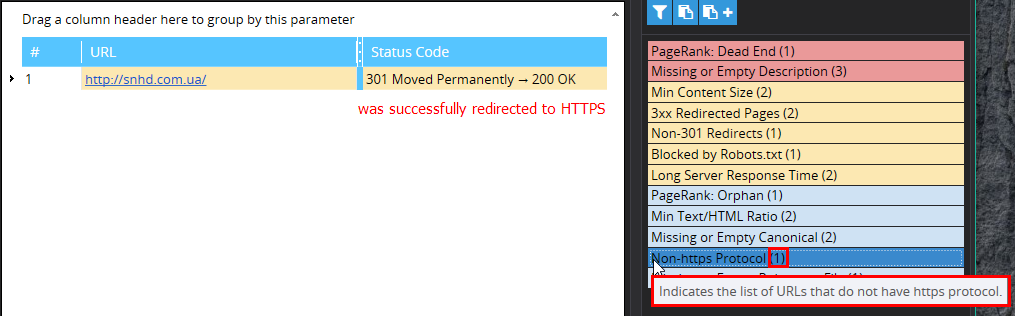
By the way, Netpeak Spider marks all pages with HTTP protocol as pages with issues. And it's got the point :)
2. Preparing to Move to HTTPS
To switch your website successfully, you need to do some preparations:
- Choose SSL certificate: paid or free. They can have different purposes (for example, personal or business), insurance (security guarantees) and degree of ‘solidity’, highlighting only the green lock, company name or the whole green bar in browser. You can read more in our recent post about SSL certificates.
- Check certificate requirements and parameters of your hosting.
- Get access to the hosting panel and FTP (given by your hosting provider).
Read more → Simple SEO plugin Wordpress
3. Switching to HTTPS in 7 Easy Steps
As an example, we use a website based on WordPress CMS with hosting controlling by cPanel. If you have nginx server (not apache), the process will differ. Comment below if you need help with similar servers – we will consider preparing another post on this topic.
3.1. Step #1
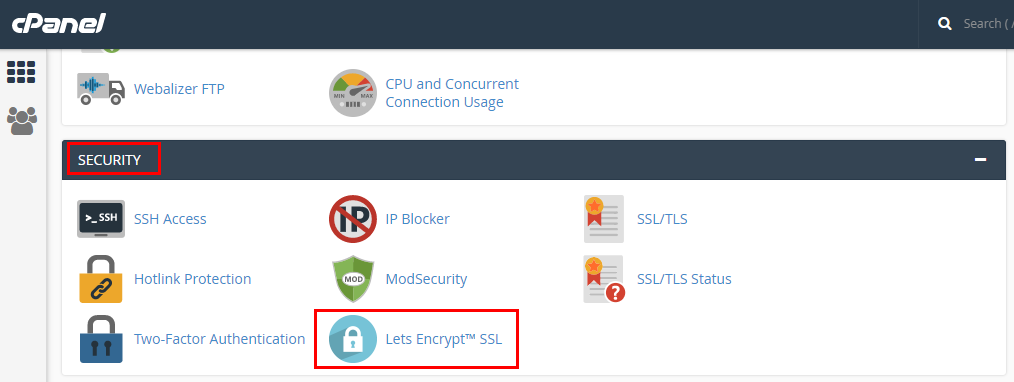
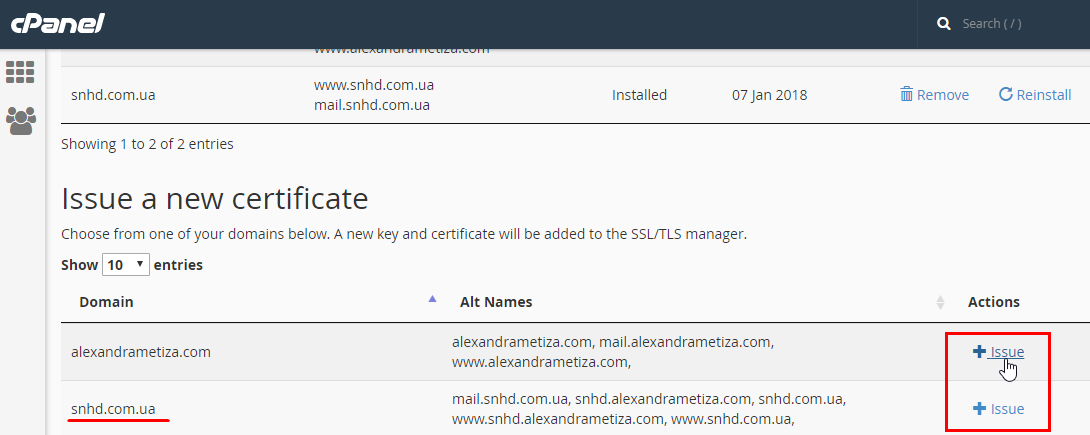
Go to the control panel in the ‘Security’ section and click on Let's Encrypt SSL button. Let's Encrypt is a free basic certificate suitable for small websites. It must be updated every 90 days. Under the heading ‘Issue a new certificate’ select the domain you are interested in and click ‘Issue’ in ‘Actions’ column. Well, the first stage is over.
3.2. Step #2
Go to the website control panel, in other words WordPress console. Move to the main settings page and register existing website address with HTTPS in ‘WordPress address (URL)’ and ‘Site address (URL)’ rows.
3.3. Step #3
Now website is already displayed as secure in the browser, but it happens only when we specify HTTPS in the address bar. This means that ‘insecure’ HTTP version of the website still exists. This is considered content duplication which has a bad effect on website ranking.
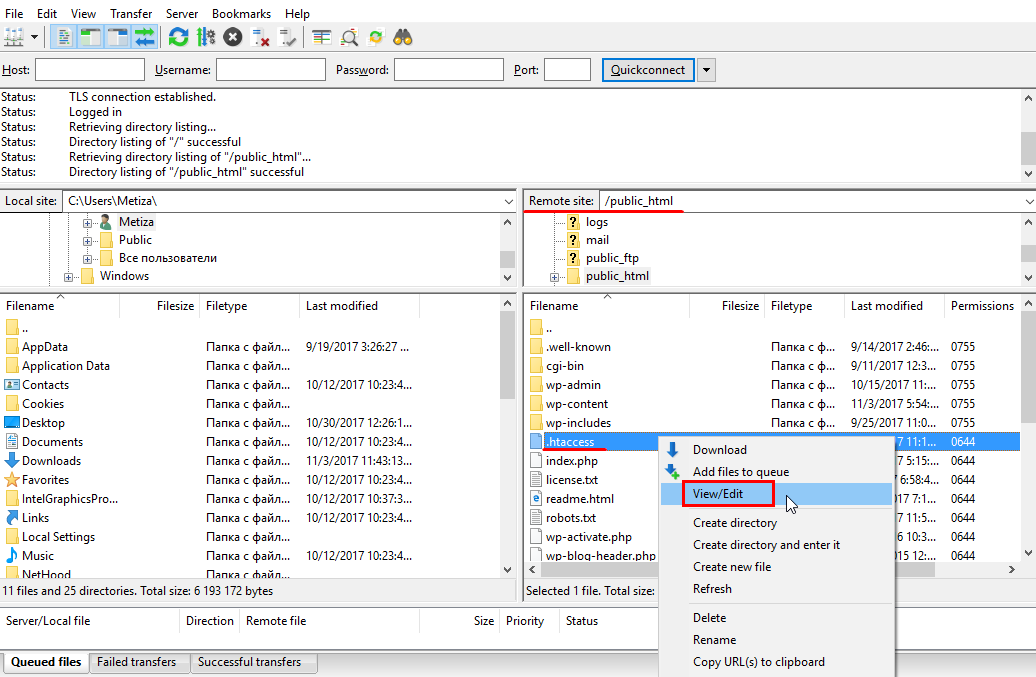
To avoid this, you have to modify .htaccess file in the website root directory. If the website domain is the main one, file will be located at /public_html/. If it is an additional one, it will be in the folder under the same name /site.com/. This is a server-based configuration file, which we will use to set redirects.
3.3.1. Firstly, we are interested in redirects from HTTP to HTTPS.
3.3.2. Secondly, it is significant from the beginning to set up a redirect to one single website version — with or without www. You will not find any difference between them, but any search engine recognizes them as two duplicate versions of the website.
3.3.3. Right-click on the icon of the .htaccess file and select ‘View/Edit’.
3.3.4. You need to set redirect instruction for the 301 redirect to HTTPS version of the website without www prefix in opened file. In this example, we use the following code:
RewriteCond %{HTTP_HOST} ^www\.snhd\.(.*)$ [NC]
RewriteRule ^(.*)$ https://snhd.%1/$1 [R=301,L]
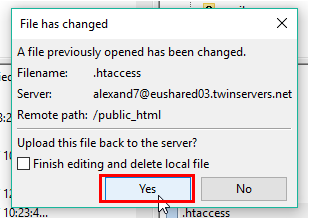
3.3.5. After closing the file, save changes and confirm file uploading to the server.
3.4. Step #4
To simplify switching, we recommend you to replace all absolute internal links with relative ones. Make sure that absolute links of your website are fixed, and contain HTTPS instead of HTTP. Here is the example of absolute and relative links:
- http://site.com/page1.html – absolute;
- /page2.html – relative.
3.5. Step #5
You can use ready-made solutions and install appropriate plugin that will help to replace links to HTTPS. In case of WordPress, this is Really Simple SSL. Activate it in WordPress console in the ‘Plugins’ menu. There you can find plugin settings. Since we have already configured the server side redirect using the .htaccess file, you need to tick only two items:
- Enable javascript redirection to SSL;
- Auto-replace mixed content.
3.6. Step #6
Now we can perform the final crawling with Netpeak Spider and make sure that all redirects work correctly.
3.7. Step #7
To finish switching and to ensure that the website is correctly indexed by search engines, you will need to make small changes in the robots.txt file and in Google webmaster’s panel.
TL; DR:
- HTTPS protocol is a must-have on every website: online stores, online services and even content projects without transactions. Moreover, HTTPS protocol is a ranking factor, which means that traffic from Google's search results depends on it.
- There are many different SSL certificates and not all of them require significant investment: you can choose free or paid certificates which worth $3 per month.
- You can configure the redirect to HTTPS manually or use plugins for selected CMS.
- It is important to check how your website looks ‘in search engines eyes’ by occasional crawling with tools such as Netpeak Spider.
In the next post you’ll find out how to create a Robots.txt file and use the Meta Robots tag. Stay tuned, a lot of interesting stuff coming, and make sure to leave comments below :)