WordPress SEO: Connecting to Webmaster Services and Analytic Systems
How to

Constant analyzing and tracking your website’s development are one of the most significant parts of every website optimization. In most cases, different content management systems including WordPress provide their own analytic services, but search engine tools can give you much more detailed data.
Major search engines such as Google, Bing, and Yahoo provide free diagnostic tools for all webmasters and SEO specialists. They help you understand how search engines see your website and quickly get notifications about some critical optimization issues.
In this article, we’ll talk about how to register in Google Analytics and Google Search Console and how to connect them to your website using Google Tag Manager.
Registration in Google Analytics
Google Analytics is free of charge and available for any website owner. The registration procedure as follows:
- Open Google Analyitcs and click ‘Sign in’ button.
- Check if you’ve chosen correct personal account (personal gmail.com or Google+ profile) before starting the procedure.
- Set up a property type (‘Website’), choose the name for your account and enter a website URL. Keep in mind to choose an appropriate website protocol. In the case if you still use HTTP, we highly recommend to use our guide for secure connection setting and only then start GA registration procedure. This will help you avoid many problems in future.
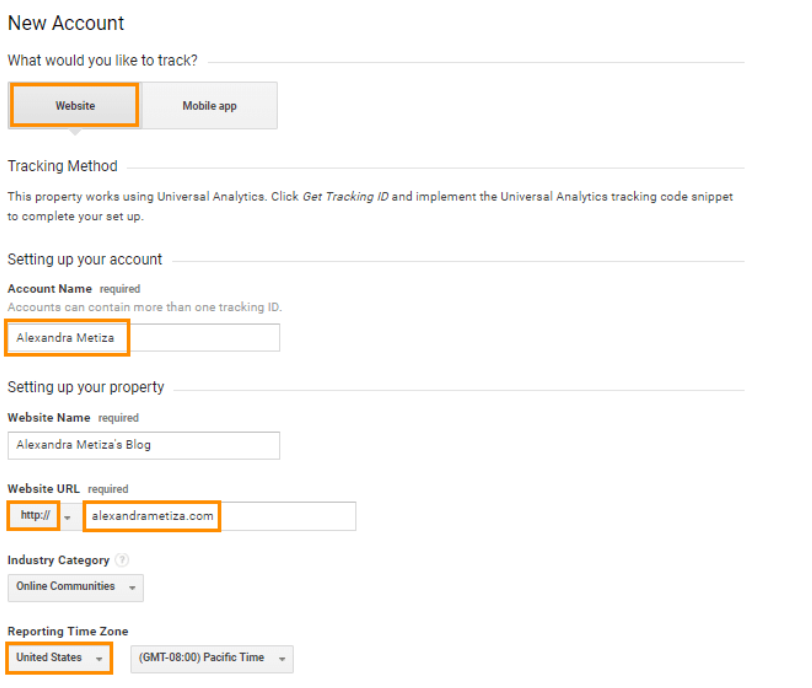
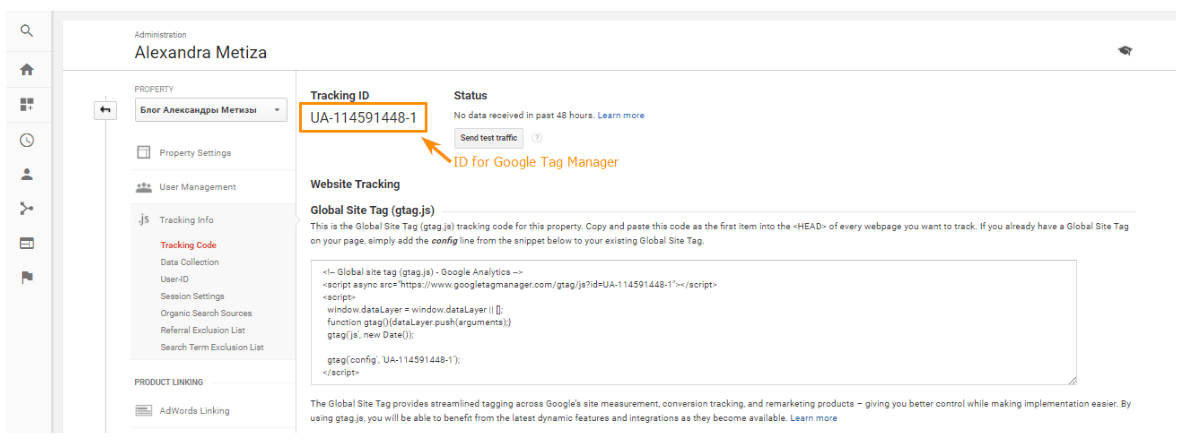
- After saving your registration information, the system will generate unique ID and specific code for implementing into your website source code. To integrate website with web analytics we’ll use Google Tag Manager, so it is enough to use ID only.
- Leave Google Analytics settings panel and open a new tab in your browser.
Why should you set up Google Analytics?

Nowadays, any tool that provides insights on site visitors is essential to your online promotion and rankings. Tools like Google Analytics that track visitors and their website journey are necessary for anyone seeking traffic growth.
Here's what Google Analytics can show you:
- Who and when visited your website;
- Visitors' action on your website;
- How visitors discovered your website;
- User interaction with your website content;
- Visitors' location and browsers;
- Users' default language;
- Visitors' screen resolution;
- JavaScript support, etc.
Such user data is incredibly helpful in developing effective SEO strategies. It also helps customize your website (i.e., theme and menu placement) and implement further improvements for it. You might also consider utilizing extra analytical services to provide deeper insights into your data. Thus, you can make more informed decisions on website optimization.
Now that you understand the importance of setting up Google Analytics for WordPress, let’s move on to adding GA to your website. But before that, follow the below steps to ensure you have a Google Analytics account.
Create a Google Analytics Account
Installing Google Analytics 4 on a WordPress site is quite simple.
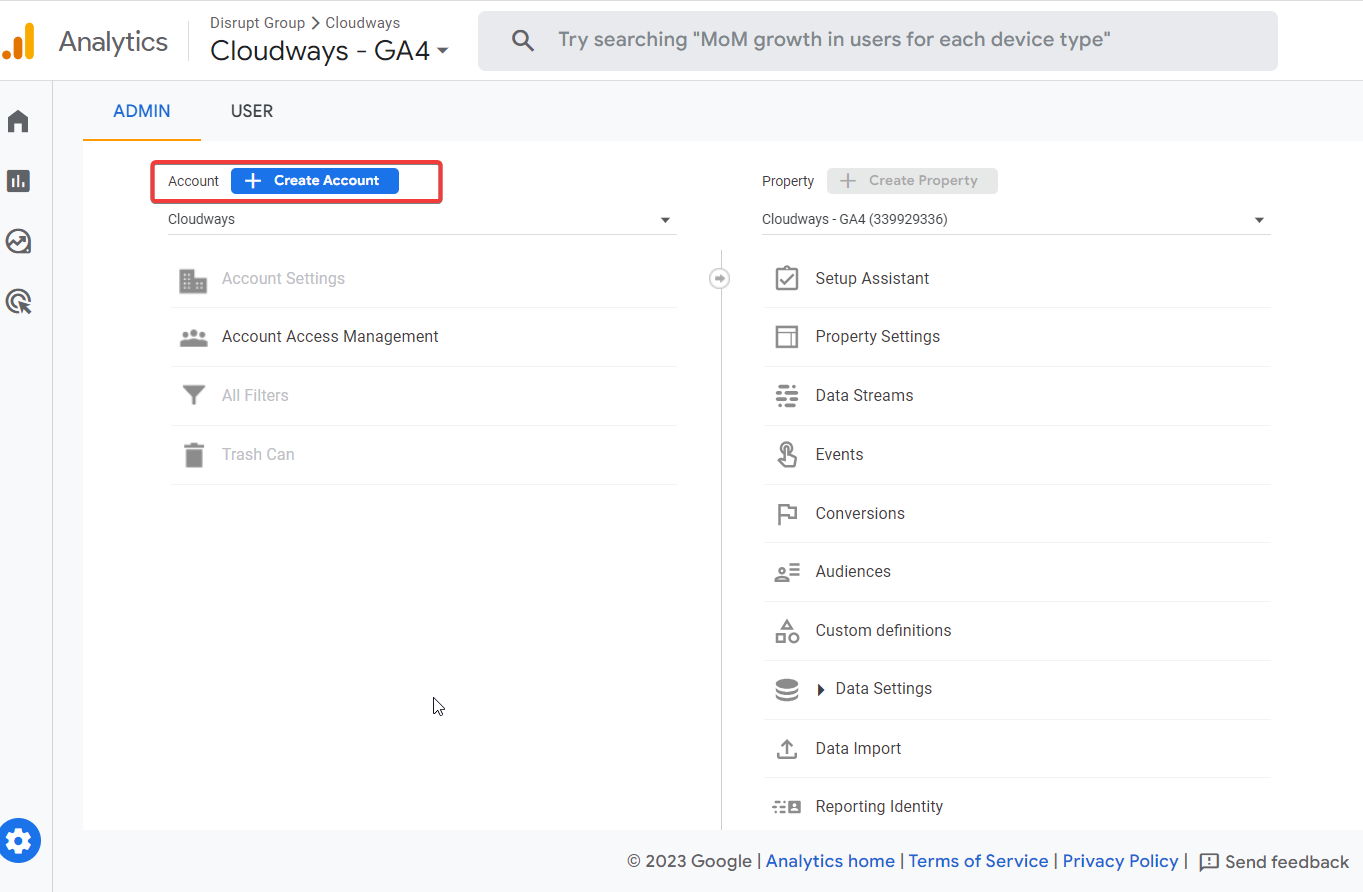
For this, go to analytics.google.com. Now:
- If you already have an account, log in.
- If you don’t have a Google account, click the "Create account" button to set it up. Fill in the necessary information.
Once you’ve created your Gmail account, open the Google Analytics homepage again and click the Start measuring button:
- Go to the Account Setup menu.
- Fill in the account name.
- Select the Account Data Sharing options and click Next.
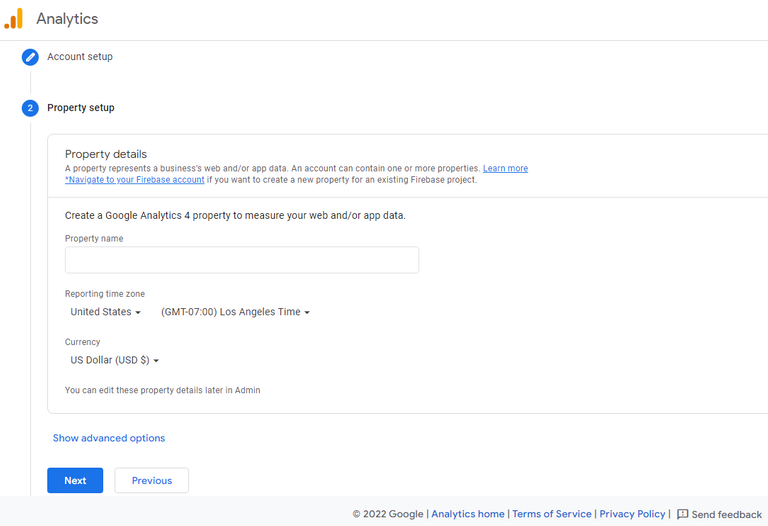
- Once you see the property setup screen, select the reporting time zone, currency, and name. Click Next.
- Then, go to the Business details form and choose an industry category, business size, and intent to use Google Analytics. Click Create once you're done.
- Agree to the Google Analytics Terms of Service.
- In data streams, pick a preferred platform to collect the data — for instance, Web.
- Set up the data stream — add your Website URL and Stream name, and click Create Stream.
You’ll now see the Web Stream Details screen, which shows the web stream has been created. However, the data collection hasn't been integrated and is thus active. This means you should install Google Tag on your WordPress website.
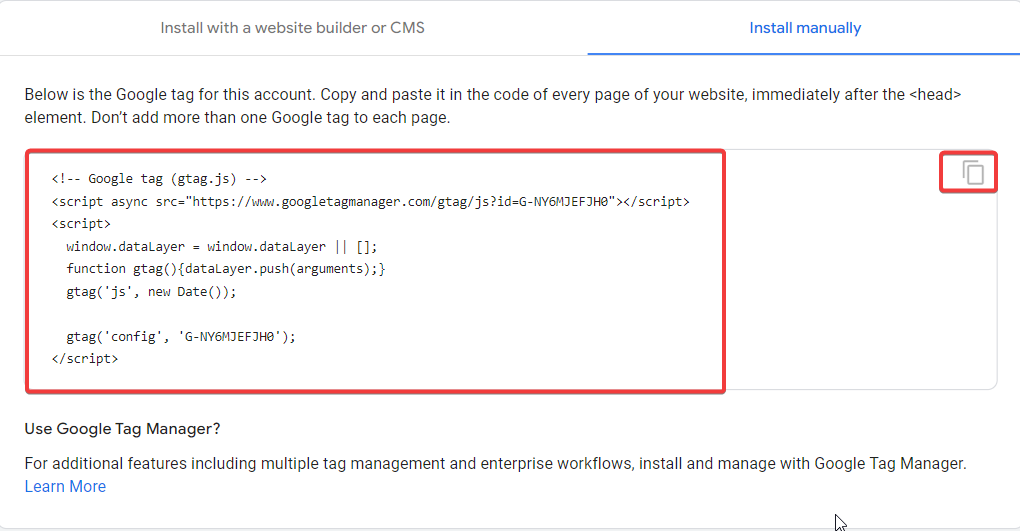
To do so, click the View Tag Instructions button to see the two ways of adding it:
1) Install with a website builder or a CMS.
2) Install manually.
When you add a tag to a website, Google will transfer data to your GA dashboard.
4 ways to add Google Analytics to WordPress
You can add a GA tracking code to your WordPress site via four different methods:
Add Google Tag Code to Header.php
You can add a tracking code from Google Analytics for WordPress by simply pasting it to your website code — in the “header.php” file.
Follow the steps below:
- Go to the WordPress Dashboard.
- Click Appearance, then Editor.
- Click the “header.php” file to edit the code.
- Paste the tracking code from Google Analytics into the header code. Make sure to paste it before the </head> tag.
- Once ready, wait a couple of hours to fully activate the installation.
Install the Google Analytics WordPress plugin
Here's how you can add a WordPress Google Analytics plugin to help you do the SEO job without any hassle:
- Go to your WordPress Dashboard.
- Click Plugins, then Add New.
- Find "GA Google Analytics". The plugin supports GA4 and will integrate into your WordPress site.
- Click Install Now and then activate the plugin.
- Configure the plugin once activated.
- Go to Dashboard → Settings → Google Analytics.
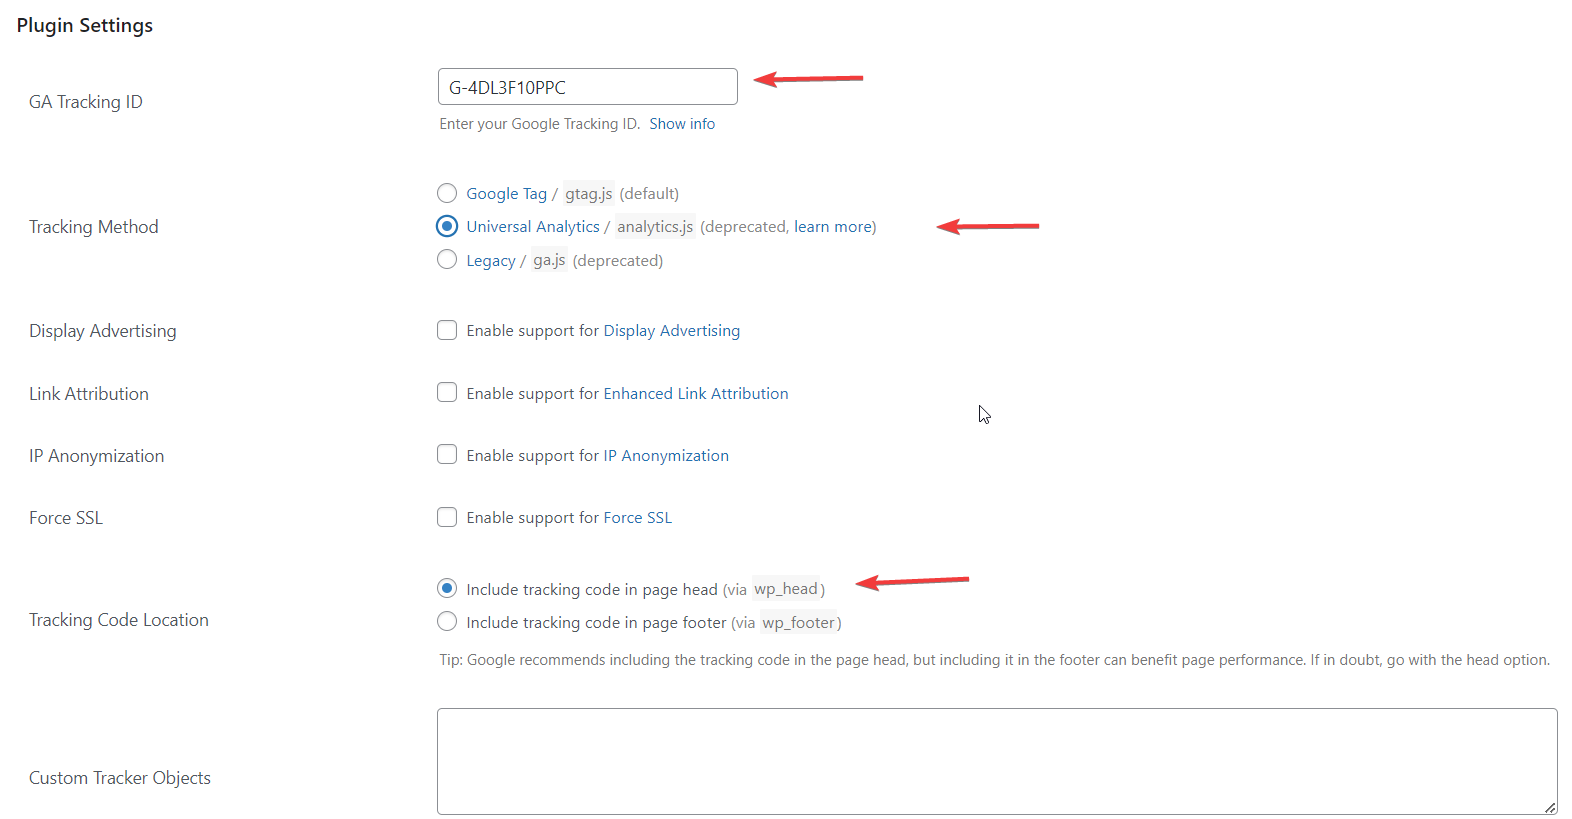
- Click Plugin Settings.
- Paste the tracking ID from the Google Analytics Tracking Code page.
- Check the "Universal Analytics / analytics.js" and "Include tracking code in page head (via wp_head)" boxes that set up GA on the website.
- Save the changes.
Method 3: Using Google Tag Manager
Another way to add Google Analytics for WordPress is a Google Tag Manager that also supports GA4. Follow the steps below to set it up:
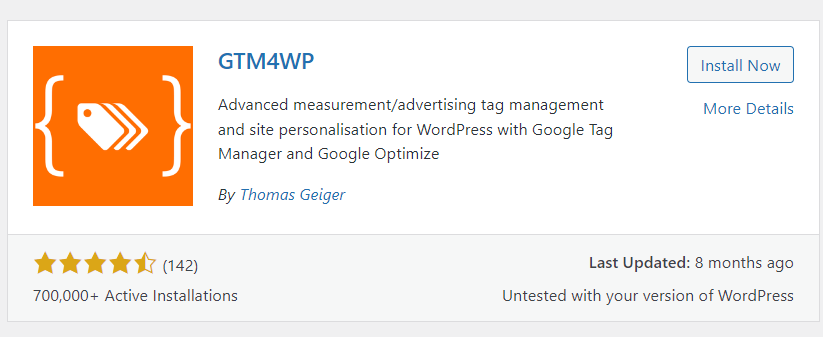
- Go to your WordPress dashboard and click Plugins, then Add New.
- Search for "Google Tag Manager" to install and activate this plugin.
- Once you're in, create an account if you haven't yet signed up.
- Enter all the required details and click Create.
- Agree to Google Tag Manager’s Terms of Service Agreement.
- Once you're ready, you'll access Google Tag Manager snippets.
- Click OK to retrieve your Google Tag Manager ID.
- Go back to the plugin’s settings to paste your GTM ID.
- Save the changes.
Congratulations, you've successfully installed Google Analytics!
Hosting WordPress Google Analytics locally
You can also host Google Analytics locally on your server for better performance since it lowers the volume of external HTTP requests.
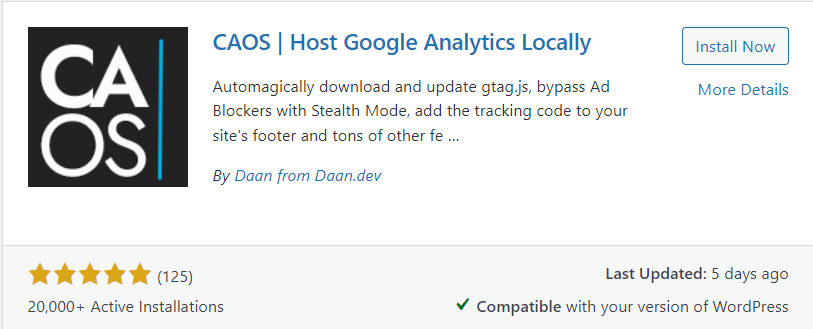
To integrate this, you can use a WordPress Google Analytics plugin, Complete Analytics Optimization Suite (CAOS).
Here's what you need to do:
- In the WordPress Dashboard, click Plugins and search for CAOS.
- Install and activate the plugin.
- Access the plugin’s settings.
- Enter the Google Analytics Tracking ID and choose the location where the tracking script should be placed.
Registration in Google Search Console
What Is Google Search Console?
Google Search Console is a free service that allows you to monitor your website’s presence on SERPs. You can use it to promptly submit new content and track the performance of your existing content. You can also use it for Google site verification, specifically in terms of site ownership.
GSC can benefit just about anyone who has a website. It allows you to:
- Track current SERP standings
- Detect website errors
- Discover and improve code markup errors
- Integrate your app with your website
Before you can reap the benefits of Google Search Console, you’ll need to verify your WordPress website. This will provide you with all the tools you need and give you access to Google search data that’s relevant to your site.
Go to Google Search Console
First, you’ll want to navigate to the Google Search Console home page. Then, sign in using your Google account.
Add Property to Search Console
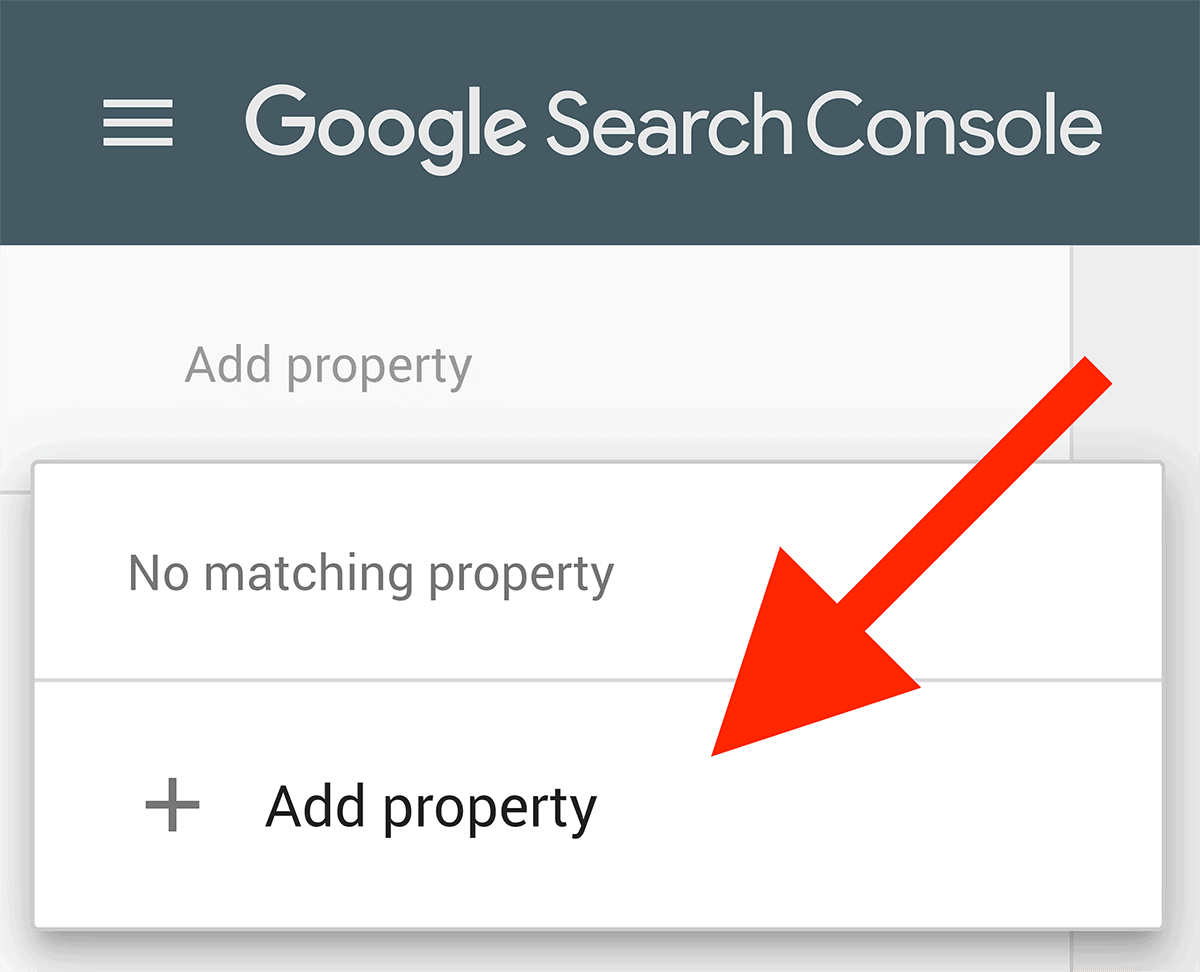
Next, click Add Property at the dashboard's top-right corner. You'll see a box prompting you to paste in your website's URL.
Download the HTML ownership verification file

On the following screen, click the hyperlink provided under the Recommended Method tab to download the HTML verification file. Don’t forget to save this file to your computer.
Upload the file to a website via FTP

To complete this step, you'll need direct access to your website’s server. You can get it via the File Transfer Protocol (FTP) or the cPanel File Manager.
Using an FTP client, enter your credentials to log into the server and upload the file to your site’s root directory. This file contains the wp-content folder, the wp-config.php file, etc. Now, click and drag the file to your site’s root folder.
Go back to Google Search Console and verify
You can return to Google Search Console and click Verify, which completes the process!
How to add GTM to WordPress
Now, let's learn everything you need to know about adding GTM to WordPress.
What Is Google Tag Manager?
Google Tag Manager allows you to create and manage your own tracking tags to measure practically anything you want.
For example, any analytics tool can measure the number of visitors landing on a given page, but what if you want to calculate the number of visitors who clicked on an embedded video there? That's when Google Tag Manager comes in handy and lets you monitor data more precisely.
Why consider installing Google Tag Manager on WordPress
Google Tag Manager integrates with Google Analytics, making it even easier to manage and track user data.
Google Analytics is included with the WordPress.com plugin-enabled plan, which is by far the easiest way to integrate it with your site. Once you have Google Analytics set up within the WordPress plugin plan, you can then integrate Google Tag Manager for extra functionality.
Once you have created and integrated your accounts into your site, you can monitor and manage almost anything. In addition to the basics of Google Analytics, you can use GTM to create custom tracking tags and manage the existing ones for deeper insights into audience behavior.
Even if you don’t have an immediate request for custom tags, Google Tag Manager makes adding basic tags to your WordPress website faster and easier. Moreover, tracking multiple data categories across all your pages saves you a lot of time.
If you’re ready to install Google Analytics in WordPress together with Google Tag Manager, here’s how to do it in just four quick steps:
Set up Google Analytics
The first step is to set up a Google Analytics account. If you are already using Google Analytics, skip to the next step.
To get started, visit Google Analytics and click on Start measuring to create your account. You'll then access an account setup page where you will need to enter the basic information about your future account.
Select preferred data sharing options and click Next. The following is the property setup page, where you'll enter some general website information before you'll be able to track it. Next, enter more specific business data to get started faster.
Finally, click Create and accept the terms of service. Now that your account is complete, go to the Google Analytics dashboard. You'll get right into the Data Streams tab to add your first data stream and start collecting website insights.
You might go for the Web option. On the following page, enter the website's URL before tracking it. You will then receive some information about your new data stream, including the Measurement ID, which is required to add Google Analytics to your site. You'll also need it later.
Sign up for Google Tag Manager
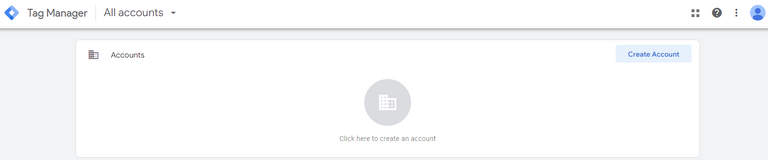
You can now access Google Tag Manager from the GA dashboard or visit the service's website. Once you log in to Google Tag Manager, click Create Account to get started — the process is also quite simple.
Enter the basic information, like your container's (website's) URL. Then, click Create to complete setting up your account. You'll then see some code snippets you'll have to integrate within WordPress later. You can copy this code or leave this tab open while moving to the next step.
Connect Google Analytics to WordPress
How to connect Google Analytics with WordPress, then? You can do it via plugins or by linking your Measurement ID in the Tools tab of your WP dashboard. Either way, you'll need a WordPress.com plugin-enabled plan.
If you don't want to add an extra plugin, simply add the Measurement ID to your WordPress settings. Click Tools on your dashboard to do so. Select Traffic and scroll down until you see Google Analytics. This requires a WordPress plugin-enabled plan.
If you're all set, enter your Measurement ID and click Save settings to launch the data collection process. Now that Google Analytics is connected to your site, you can finally integrate Google Tag Manager.
Add Google Tag Manager to WordPress

The final step is actually installing Google Tag Manager on WordPress. To do this, get the code snippet from earlier.
First, install the Insert Headers and Footers plugin to add a custom code to your website. Once you've installed and activated the plugin, go to Settings and select Insert Headers and Footers. Copy the code as stated in the Google Tag Manager's guide.
Paste the first snippet into the Header section. Then, copy and paste the second one into the Body section. The second snippet should still work even if pasted into the Footer section — however, it's better to place it higher up in the code.
Once you click Save, you're all set. You can now create custom tags for your WordPress site and track them via Google Analytics.
Integrating tracking codes
Finally, let's see how to add tracking code to WordPress. There are two possible ways:
Using a plugin
Here's how you can use a plugin to add a tracking code:
- Install the plugin: Header and Footer.
- Go to the plugin configuration panel.
- Under the "Page head and footer" tab, add the tracking code to the section that says "Code to be added to the HEAD section of every page."
Adding directly to the header.php file
Here's another way you can add tracking code to WordPress:
- Go to "Appearance," then "Editor," and "header.php."
- Search for </head>.
- Paste the tracking code before the closing </head> tag.
- Save the code by clicking "Update File," and you're all set!
Check URLs for SEO parameters with Netpeak Checker
As we've established earlier, regular checkups are essential to streamline your website's performance and ensure everything works perfectly. In that sense, Netpeak Checker comes in handy.
This powerful tool offers many features and enables integrations with various SEO-related services. Here's what else you can do with Netpeak Checker:
Integration with 25 other services to analyze 450+ parameters
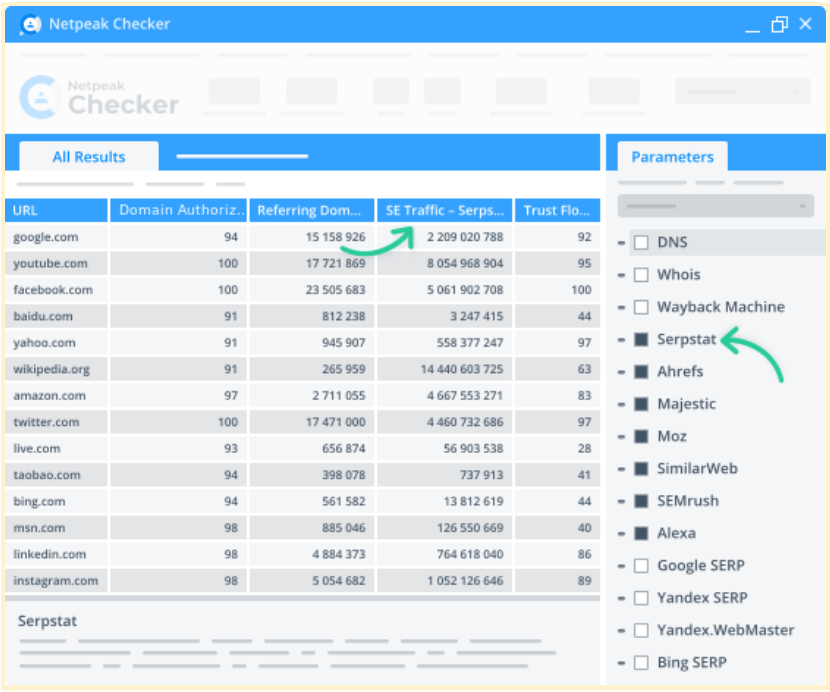
Netpeak Checker enables integrations with 25+ SEO services: Moz, SimilarWeb, Ahrefs, Serpstat, Google Analytics, and many more.
50+ on-page parameters
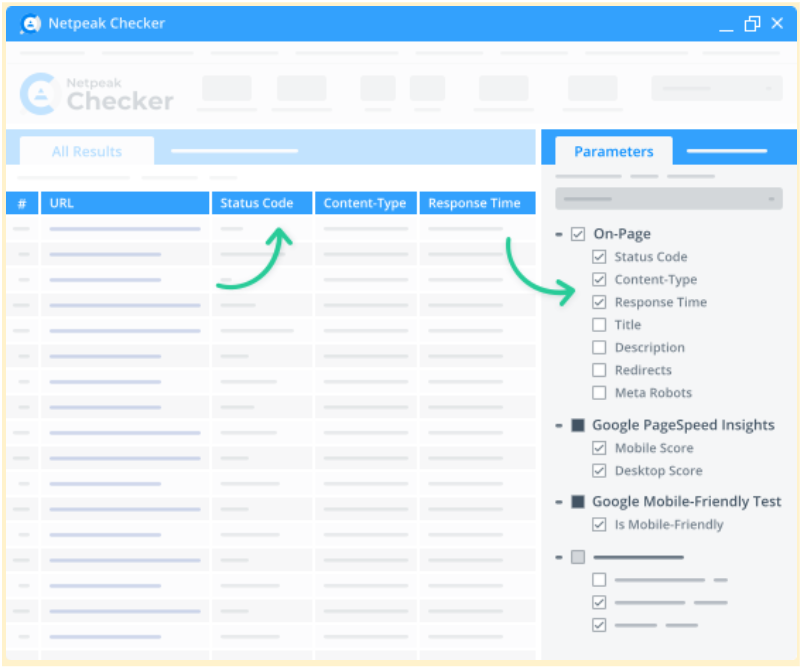
Netpeak Checker delivers research results in a real-time dashboard. The metrics you can monitor include redirects, titles, response time, status codes, mobile-friendliness, etc. All you have to do is choose the required stats and hit "Start."
Website traffic estimation
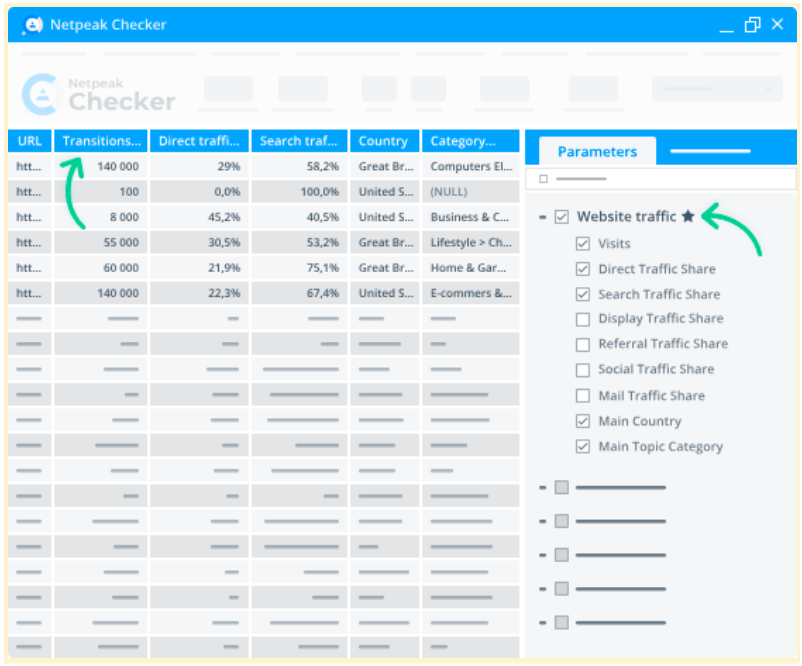
Netpeak Checker shows the traffic volumes on a target page, potential link-building donors’ share ratios, as well as traffic by location. Plus, it shows what types of traffic are prevailing on a selected page (search, organic, direct, mail, social, etc.).
Batch Core Web Vitals checkup

You can also retrieve data from Google PageSpeed Insights to analyze and monitor your website's loading speed, responsiveness, and visual stability.
Integration with Google Drive & Sheets

Connect your Google Drive account to Netpeak Checker so you can promptly export any report to Google Sheets and easily share them at any time.
Run an SEO audit with Netpeak Spider

If you need to check whether your website performs well using Google Analytics or Search Console, Netpeak Spider is your go-to app.
With this tool, you can monitor your website's key metrics in real time, download crawling results in a convenient format, and integrate data from other SEO tools for in-depth data research.
On top of that, Netpeak Spider is super easy to work with. Here's what you have to do to start crawling:
- Paste the URLs you need to check from a clipboard into the search bar
- Select the metrics you need to analyze
- Click "Start" to launch the crawling process
Here's more: take a look at some of Netpeak Spider's key features:
Data filters and segmentation
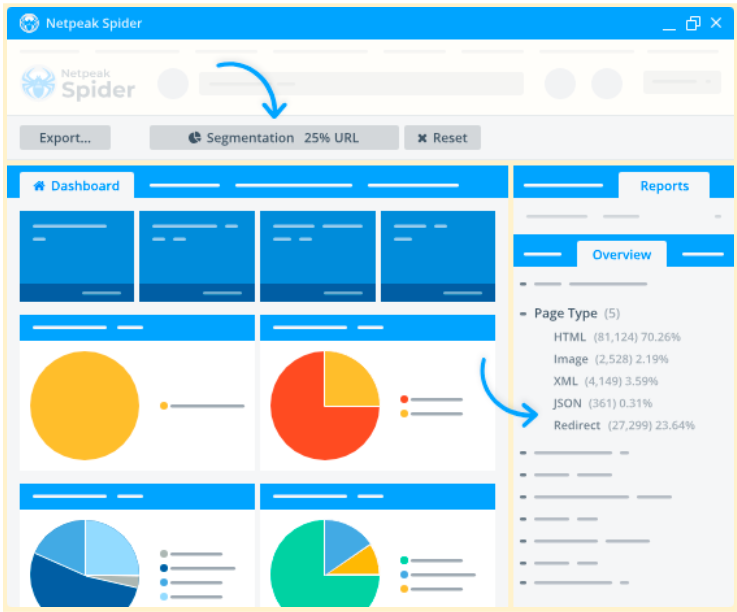
Netpeak Spider segments and breaks down the research data into categories, allowing you to select the parameters you need to analyze at the same time. Using an interactive dashboard, you can set customizable filters and change the data overview mode for more convenient usage.
Internal PageRank calculator
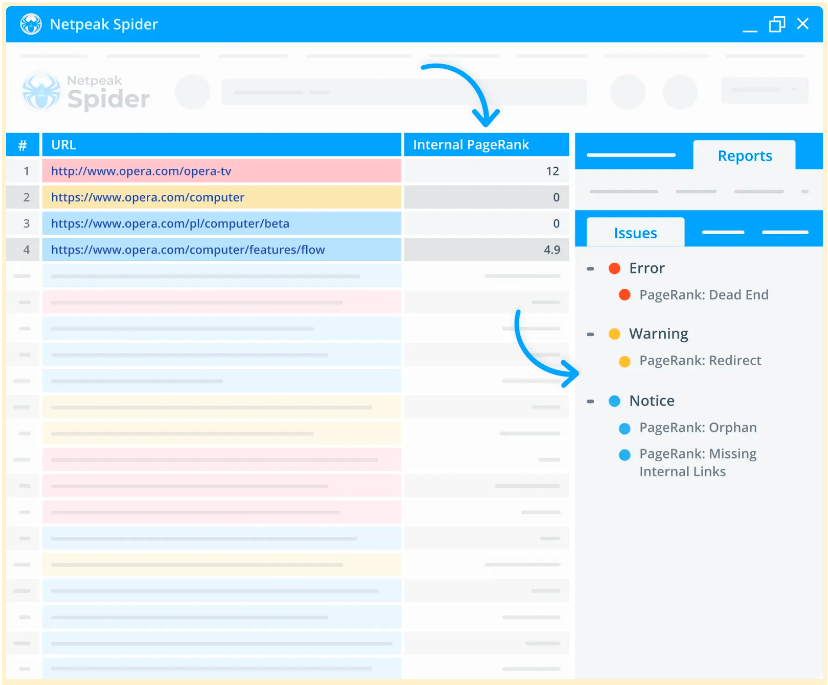
The PageRank calculator helps you monitor each page's internal linking, link weight distribution on any page, and the link equity that your pages use or don't get at all.
Integrations with Google Analytics and Search Console
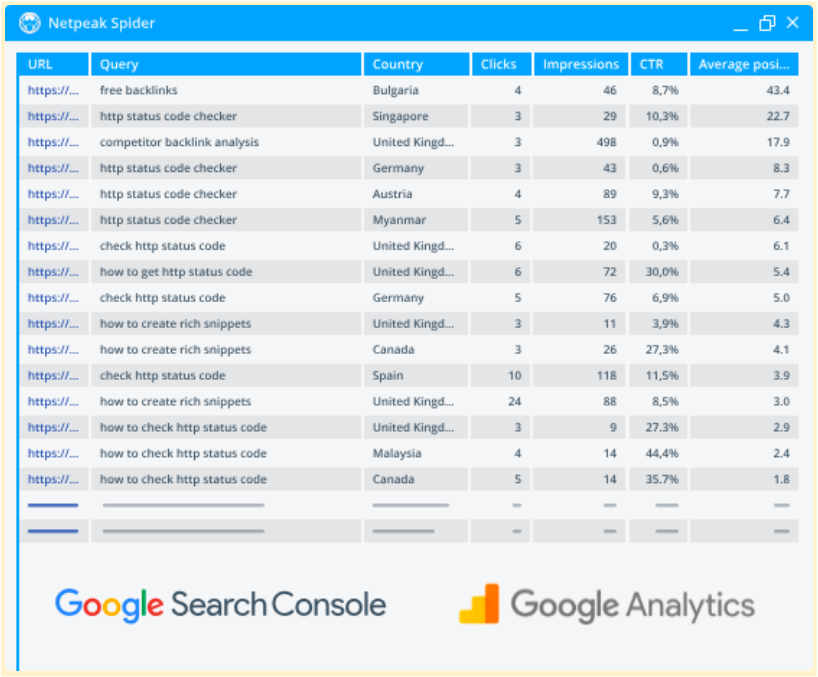
Our tool helps retrieve stats from Google Analytics and Search Console to enrich the research data. You can access essential insights on traffic, your page goals, conversion, and other key eCommerce parameters.
Summary
Analytic systems and webmaster services provided by search engines are basic tools for every web developer, SEO specialist, and website owner. They help you get a complete picture of search engines’ perception of your website.
You need to make a few simple steps to start using them on your WordPress website:
- Register in Google Search Console, Google Analytics and Google Tag Manager.
- Connect your Google Analytics account with Google Tag Manager.
- Implement GTM code and Google Search Console meta tag in your current template’s header.php file.
- Check if everything was done properly.
- Start using new tools and gather insights :)
If you still have some questions or comments, please leave them under this post and we’ll be glad to answer them!
By the way, the next post in this series will be dedicated to WordPress websites markup. We’ll talk about its different types and implementing. Stay tuned!