WordPress SEO: Social Media Integration on Your Website
How to

We decided to dedicate our new WordPress SEO post to connecting social media pages with your website. In this post we’ll talk about social media widgets and social buttons integration. Also, we’ll explain how to set external blog commenting service that allows social media authentication.
1. Social Media Connection Setting
There are several social media that require confirmation for correct connection to your website. First and foremost are Google My Business (and Google+ as a part of it) and Pinterest.
1.1. Google My Business (GMB)
Google My Business acts as a distinctive local business catalog. Registration in GMB helps Google to show your business’ ‘card’ with the well-structured information in search results.
Google My Business descriptions state that:
This social network plays an important role in your website’s SEO for several reasons:
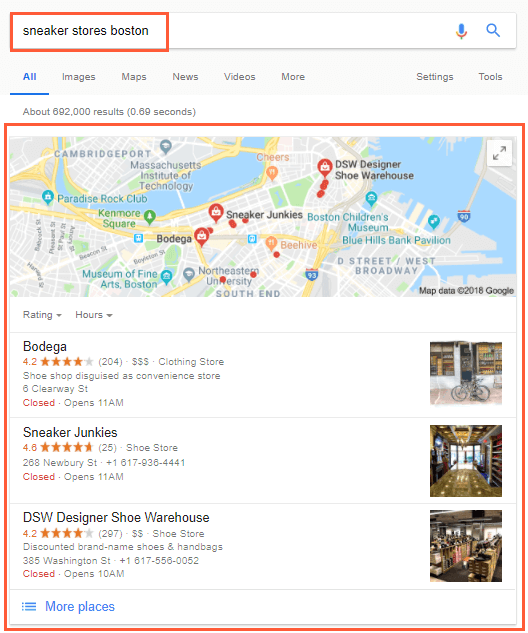
- It can increase your visibility because of GMB listing in Google search results.
- Google My Business profile activity is one of the Google ranking signals.
- It is one of the main local SEO tools.
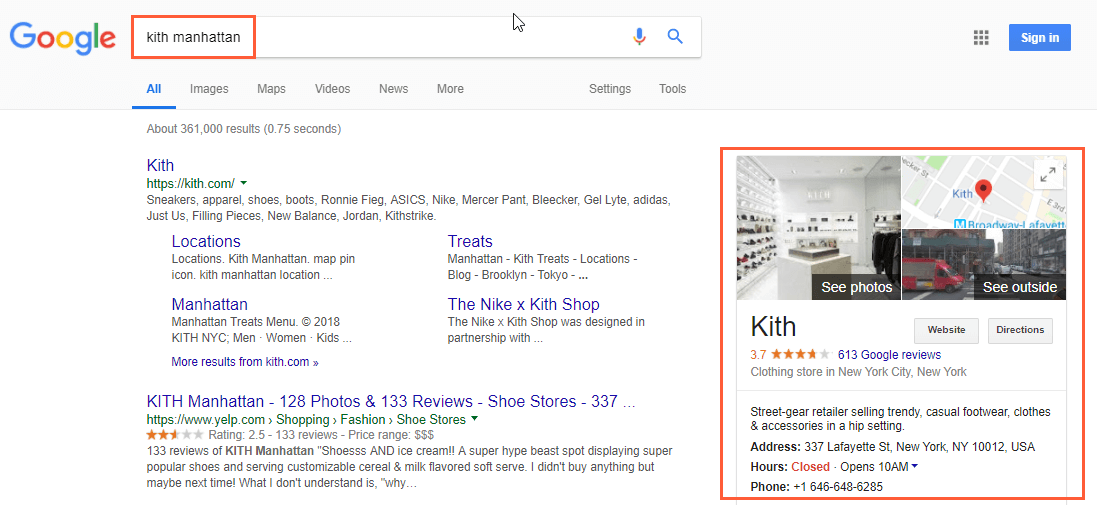
Using Google My Business service is totally free. GMB registration procedure is simple and quick. At the end Google will ask a confirmation of your actual address. To provide it, you have to receive a letter from Google with confirmation code and then enter it in GMB profile settings. After this simple procedure your website’s GMB card will appear in Google’s local search (including local listings).
1.2. Pinterest
Pinterest personal and business accounts have some differences in functionality. But unlike the other social media, Pinterest offers a full-fledged connection with a website for both of them. So which type of account you should choose? Our answer is business account. Free corporate account will not grant you a lot of great features, but it can be useful if you’ll need Pinterest paid advertising tools in future.
Connecting both types of accounts with a website is practically the same process.
This is what you need to do to connect your website to a Pinterest account:
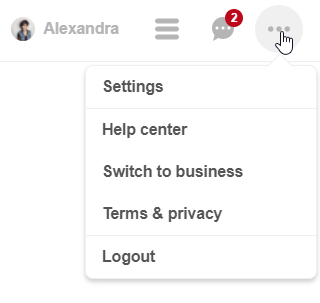
- Go to the ‘Profile Settings’.
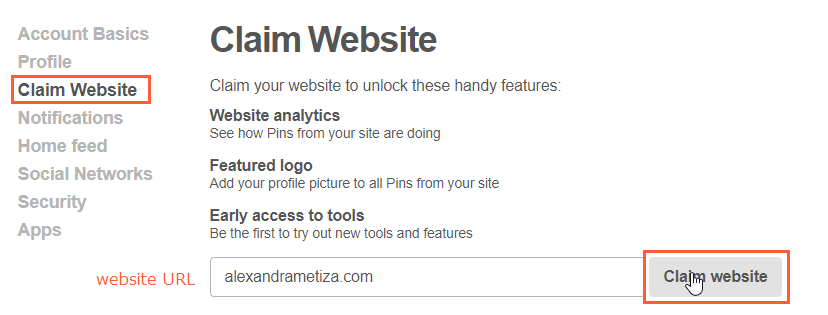
- Scroll down to ‘Claim Website’ section.
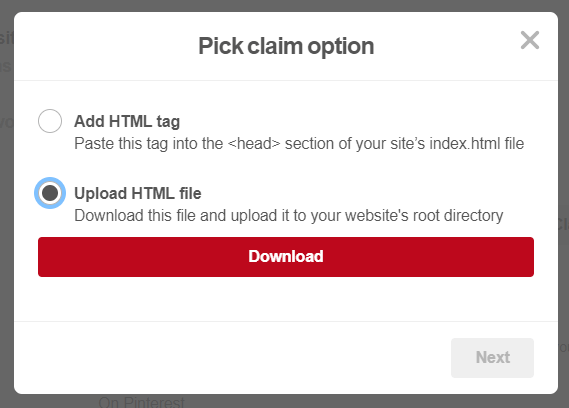
- Enter your website’s URL in a box and click on ‘Claim website’ button.
- Select one of two available claim options. We chose the second one. It implies uploading a specific file to the website’s root directory. This is the easiest way because it doesn’t require any manipulations with source code and assistance of a web-developer.
- Upload downloaded HTML-file to the website root directory (if your domain is the main one, it should be placed in /public_html/ folder; choose /site.com/ folder if your domain is the additional one). You can easily do it with FTP-client. Download and install Filezilla or any other FTP-client and set all parameters provided by your hosting service.
Read more → Simple SEO plugin Wordpress
2. Setting Social Media Widgets
In the beginning of technical optimization process, you must think about your potential visitors. What kind of information they are interested in? What answers are they looking for? It is very important not only for usability, but also for both users and search engines.
Engaged users would probably like to know more about your company (brand, project) – beyond the information provided at ‘About Us’ page (by the way, it also must be properly optimized). Therefore it is significant to place social media buttons and widgets on such elements of your website as footer, main and additional menu or sidebar.
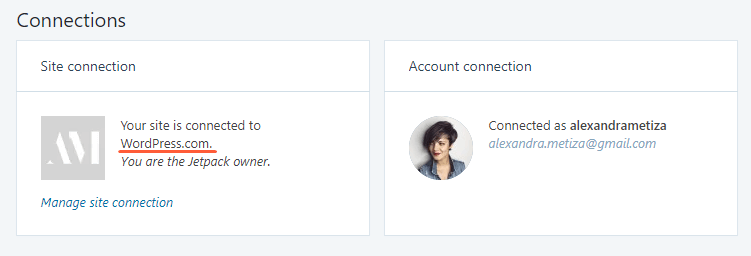
To do so you have to install Jetpack plugin and create your personal wordpress.com profile to activate it. To set all Jetpack parameters, go to the ‘Jetpack’ section in the main menu and follow plugin instructions on the ‘Console’ tab.
This plugin considerably extends WordPress functionality. In our next posts we will use it again many times.
2.1. Adding Basic Social Media Icons Widget
There are several social widgets available from Jetpack that can be easily implemented within any WordPress template. One of them is ‘Social Media Icons’ widget with a simple and neat design.
To add ‘Social Media Icons’ widget you need to:
- Enter the website console.
- Select ‘Customize’ in the ‘Appearance’ menu.
- Decide which website module should contain social media buttons. It can be sidebar or footer. We recommend choosing footer.
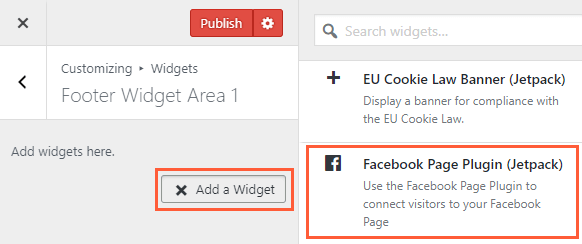
- Push ‘Add widget’ button, choose the widget mentioned above and set parameters according to your social media preferences.
- Save changes and exit template customizing mode.
- Open your website as an ordinary user and check if all created social buttons work correctly.
2.2. Additional (Social) Menu
If your template allows you to create an additional menu, you can use it for social media profiles links.
To create additional ‘social’ menu, you need to:
- Enter the website console, then choose ‘Appearance’ → ‘Menu’.
- Create a new menu that contains your social media links.
- Go to the template customizing mode.
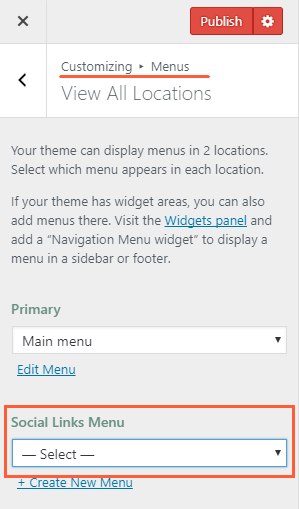
- Choose ‘Menus’ section and open ‘Menu Locations’. If your template supports additional menu, you can click on ‘Secondary / Social Menu’ and select the menu you’ve created in a console.
- Save changes.
2.3 Original Social Media Widgets
Jetpack plugin makes it possible to add Facebook, Flickr and Twitter original widgets in a few minutes.
To add the original social media widgets you need to:
- Go to the ‘Appearance’ → ‘Customize’.
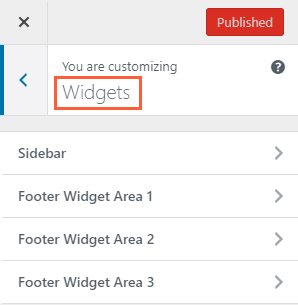
- Enter the ‘Widgets’ section and select one of the available areas in a sidebar or a footer.
- Add one of the proposed widgets – ‘Facebook Page Plugin’, ‘Twitter Timeline’ or ‘Flickr’.
- Fill the widget area ‘Title’ and customize it according to your taste.
- Save changes, leave the editing mode and check if everything works properly.
3. Setting External Blog Comment Service
If you want to use external blog comment service instead of default WordPress commenting system, think if you need on-site user registration. If you don’t need it and you want to simplify visitor interaction process, it will be better to use external add-ons. It will let your users authorize using their social media accounts and leave comments in the easiest way for them.
You can have your choice of any popular solutions, but we’d like to advise you to try Disqus.
To install Disqus on your website you need to:
- Register on Disqus website.
- Go to the 'Create a New Site' page.
- Type your website URL, select its language and main category.
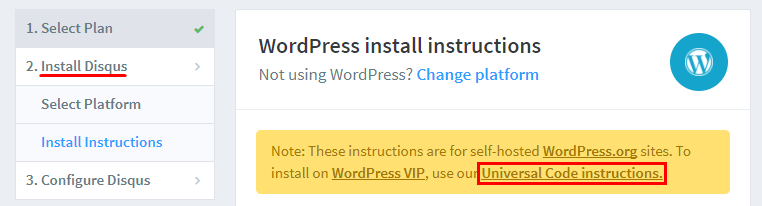
- Open ‘Instal Disqus’ tab and select WordPress platform.
- Go to the ‘Universal Code Instructions’ page.
- Open your website console in a new browser tab. Go to the ‘Appearance’ section and open ‘Editor’.
- Select ‘Single post’ (Single.php) from a file list. Copy the source code and paste it into a new file on your computer (it can be useful in case you do something wrong).
- Go back to Disqus settings page. Copy the code from the paragraph 1 and paste it in a new line under tag in a ‘Single post’ file. Save changes.
- Go to your website console and scroll down to the main settings section; select ‘Discussion’.
- Deactivate the ‘Allow people to post comments on new articles’ option to avoid simultaneous presence of two comment systems (WordPress and Disqus).
- Apply new settings. Create and publish a new test post and then open it in a new browser tab to be sure that Disqus is integrated properly. Delete this post.
4. Adding Social Media Buttons
4.1. Adding Social Buttons Using Jetpack
You can install social media buttons (‘Share’, ‘Tweet’, etc.) on your website using Jetpack plugin. This plugin supports social media buttons integration function. There you can find Facebook, Twitter, Tumblr, Pinterest, Telegram, LinkedIn, Reddit, Google, WhatsApp, Skype, and some other social media buttons.
Jetpack allows you to choose buttons selectively or all at once and automatically put them on some type of page. And, moreover, buttons design is visually pleasing – you can choose neat monochrome version or brand style of each social network.
To add social buttons with Jetpack plugin you need to:
- Enter a website console and choose ‘Jetpack’ → ‘Settings’ → ‘Sharing’.
- Turn on the ‘Add sharing buttons to your posts’ option.
- Click on ‘Configure your sharing buttons’ button below.
- Select all buttons you want to use on your website.
- Choose preferred button design.
- Choose the type of pages that must contain buttons.
- Save changes and get back to a console.
If you need social buttons with advanced functionality, you can find other solutions including original buttons provided by every social media platform. Keep in mind that some of them will require developer’s help.
Summary
To set a basic connection between your website and social media pages, you can use several free tools including Jetpack plugin and Disqus blog commenting service. They allow you to:
- Install social media widgets on your website.
- Add social media buttons.
- Set convenient external blog comment service.
- Make a great basis for search engine optimization from Social Signals point of view.
If you have any questions about Social Media Connection and WordPress SEO – feel free to write them in comments. We’ll be glad to answer them ;)