How to Crawl Slow Websites with Netpeak Spider
Use Cases

The crawling process in Netpeak Spider can be a path with many twists and turns. There’s always a reason behind occasional crawling issues. The most wide-spread ones are:
- Server response time delay. Ideally, your server response time should be under 200 ms. If your website is too slow, it’s on a danger list of crawling issues. As for Netpeak Spider, you can face the ‘Timeout’ error in the ‘Status Code’ column.
- A too big or too small number of threads. Don’t rail against a big number of threads if your website is strong enough to bear it.
- The use of low quality or free proxies. Free comes at a price. Not that it’s totally bad to use free proxies, but be ready for the hassle.
- The use of JavaScript rendering during crawling. It will increase the crawling time due to the rendering wait time.
- The website uses a security system against crawlers. You may notice it when 429 and 503 response status codes, or redirects to solve captcha appear. Usually, it means that the website has a reduced number of simultaneous server requests for a given amount of time.
Though the list of issues may be longer, the point of this blog post is to help you adjust to the slow website realities and configure the crawling process to make it possible to crawl the website.
- 1. Select the Crawling Mode and Adjust Crawling Area
- 2. Put Image Crawling on Ice
- 3. Introduce Restrictions
- 4. Adjust Crawling Speed
- 5. Set Automatic Сrawling Pause
- 6. Use Proxies
- Bottom Line
Netpeak Spider crawler has a free version that is not limited by the term of use and the number of analyzed URLs → you can test many features and approach the results in the built-in table.
To get access to free Netpeak Spider, you just need to sign up, download and launch the program 😉
Sign Up and Download Freemium Version of Netpeak Spider
P.S. Right after signup, you'll also have the opportunity to try all paid functionality and then compare all our plans and pick the one most suitable for you.
1. Select the Crawling Mode and Adjust Crawling Area
If your goal isn’t to crawl the entire website, narrow down to a specific directory not to put the website under the lasting load. In the program, you can do it by restricting the crawling area in several ways:
- Limit crawling to one directory.
- Enter a URL with the directory you need into the ‘Initial URL‘ field.

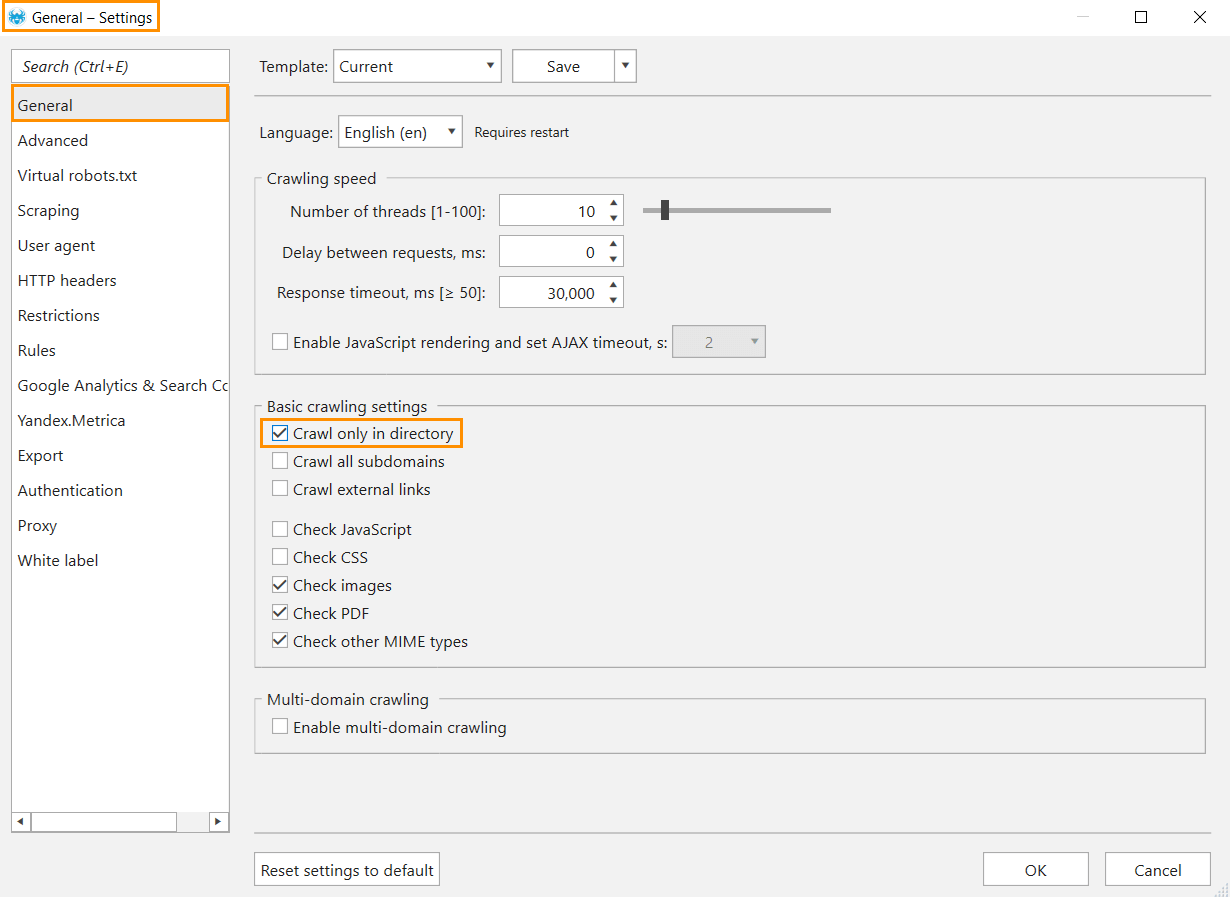
- Enable the ‘Crawl only in directory‘ option in the general settings. Note that this mode requires an appropriate URL structure when URLs of this category and its pages begin with the same path. For example, netpeaksoftware.com/blog and netpeaksoftware.com/blog/category/how-to-use-html-headers-for-better-seo-performance.
- Enter a URL with the directory you need into the ‘Initial URL‘ field.
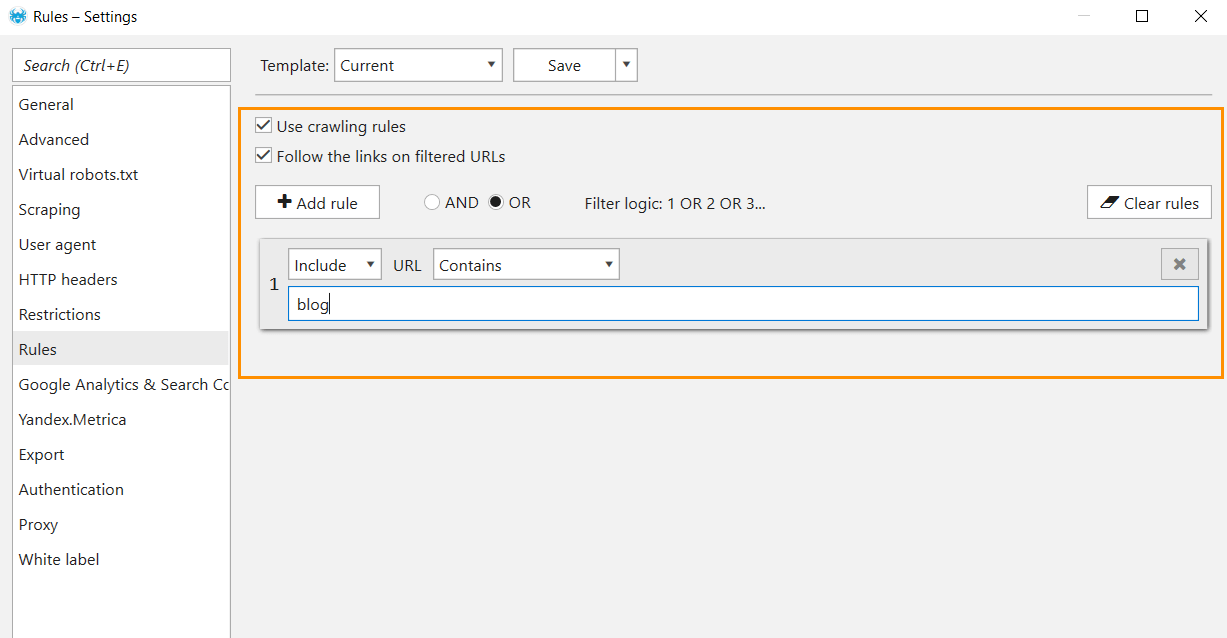
- Restrict crawling area by excluding or including exact folders or entire directories → this feature will help you focus only on the pages that match certain rules. These might be URLs that contain particular words. Let’s say ‘blog.’
2. Put Image Crawling on Ice
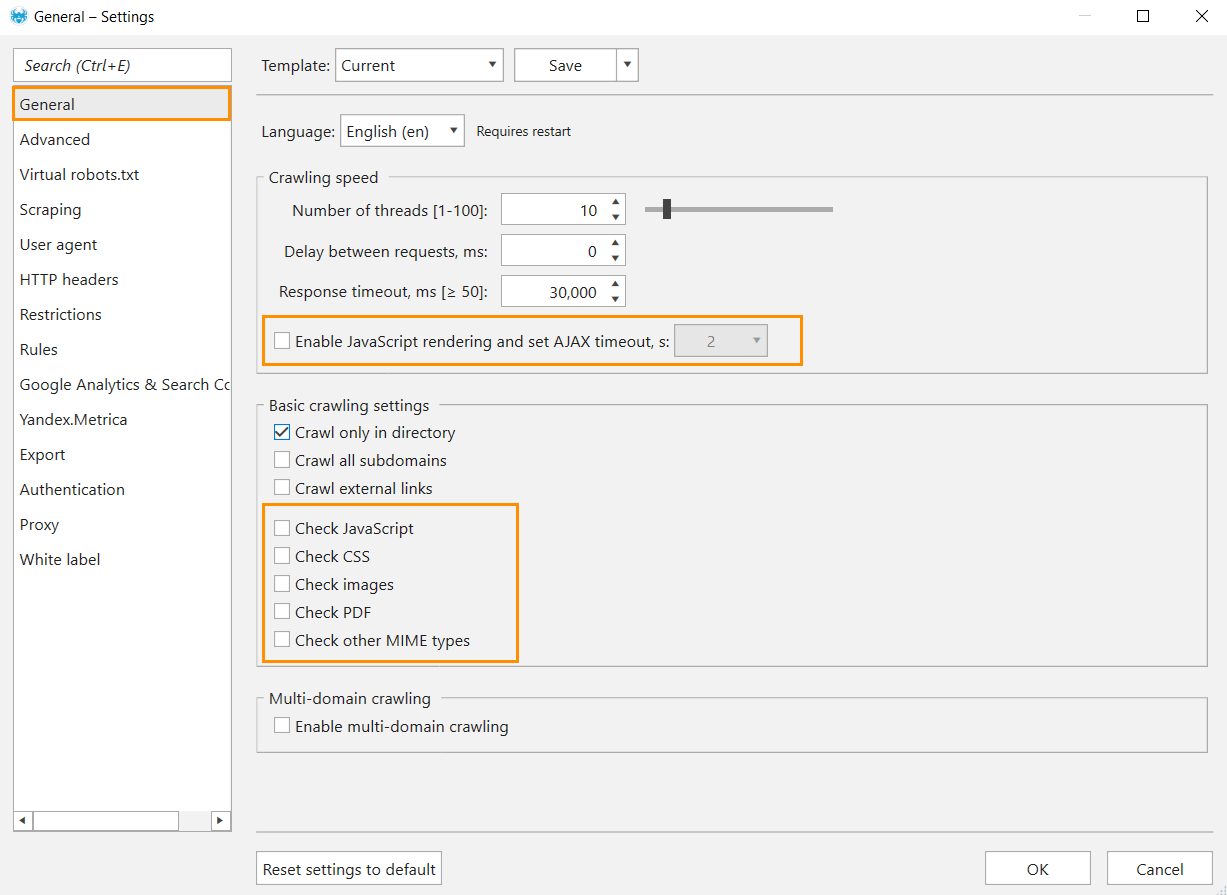
Turn off the crawling of images, PDF, CSS, and other MIME-types of files and disable Javascript rendering. It will decrease the number of requests during the crawling and allow you to crawl the website for other issues. Note that the main SEO-parameters will not be checked for these files.
3. Introduce Restrictions
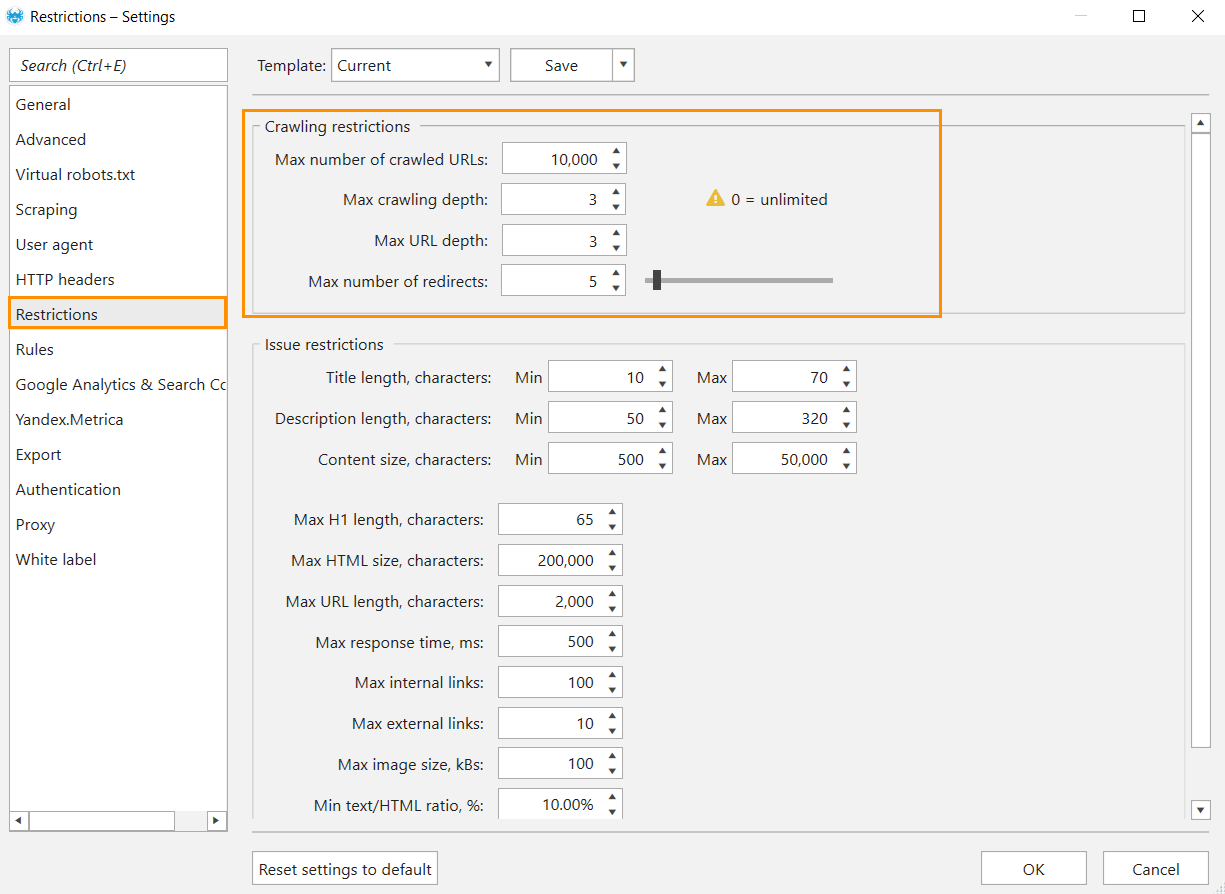
Another way to alleviate crawling pressure on slow websites is to introduce restrictions. On the ‘Restrictions’ tab you can set:
- Max number of crawled URLs.
- Max depth of crawling (the distance from the initial URL to a target URL, measured by clicks).
- Max URL depth (the number of segments in a URL of a targeted page).
4. Adjust Crawling Speed
By default, the number of threads (a thread stands for a separate connection to a website) in Netpeak Spider is 10, and the response timeout (waiting time for server response) is 30,000 ms, which is all good for high capacity websites and a turmoil for low capacity ones. Besides, a large number of threads create a surplus load on a website, which can impede content delivery to real users.
With your real website capacities in mind, adjust the crawling speed of Netpeak Spider to achieve better (and faster) results. Here’s what you can do:
- Decrease the number of threads → set up no more than 5 threads. It will reduce the number of concurrent parallel connections and decrease the load on a website.
- Set a delay between requests → adjust a delay between requests that are sent by the crawler to a server. Delay is applied to each thread, so if the website is sensitive to high load, use a delay together with a minimum number of threads. Set 500 ms between requests for starters.
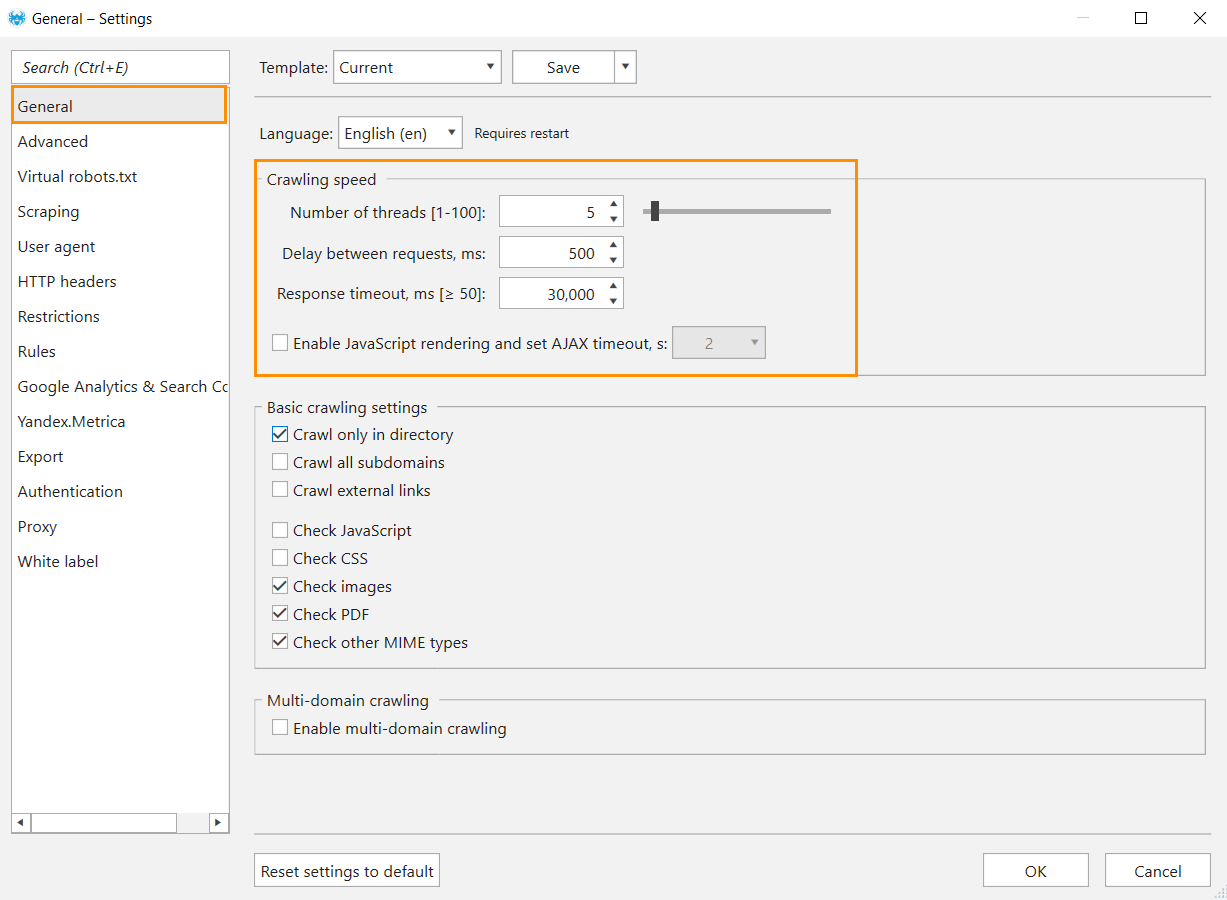
- Increase response timeout → by default Netpeak Spider waits 30,000 milliseconds for the server response before switching to the next URL. If you know that the server response speed is low, you can increase the response timeout.
5. Set Automatic Сrawling Pause
If you see a lot of URLs return ‘429 Too many Requests‘ status code, it means that the crawling derailed due to too many requests sent from your server for a short period of time.
If you stumble upon this issue, take the following steps:
- Go to ‘Settings → Advanced‘ and tick options in the ‘Pause crawling automatically‘ section:
- When the website returns the ‘429 Too Many Requests‘ status code.
- When the response timeout is exceeded.
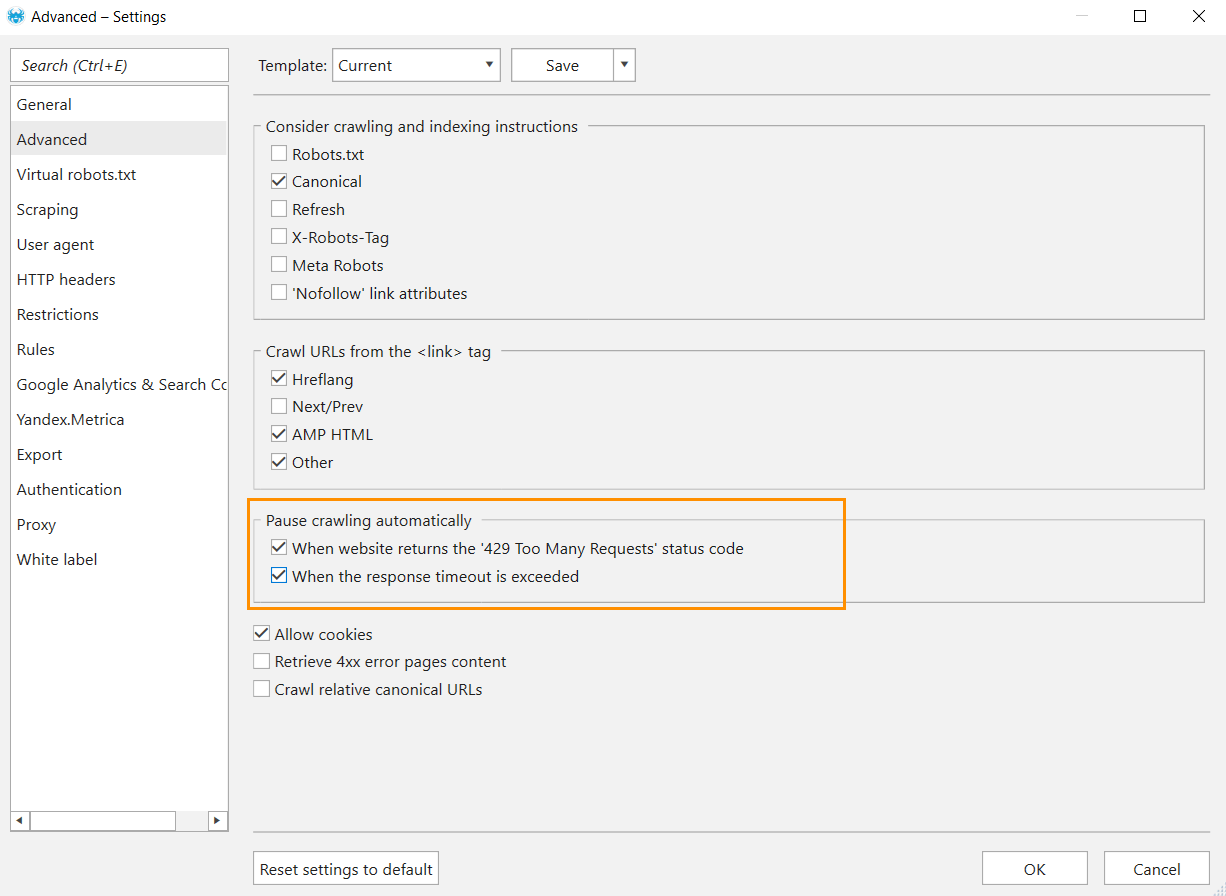
- Decrease the number of threads in general settings.
- Set a delay between requests,
- Continue crawling. If the errors persist at the beginning – restart crawling or recrawl unavailable URLs: just select the URLs in the table and use the Ctrl+R shortcut.
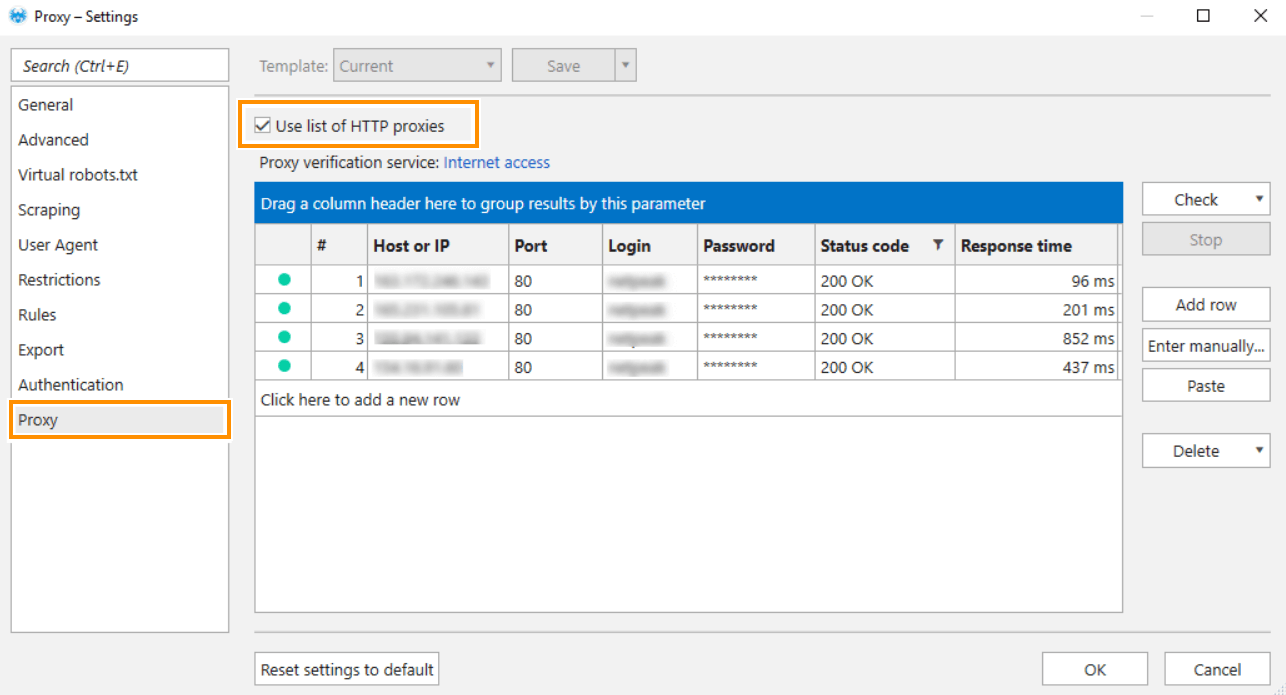
6. Use Proxies
A proxy is a middleman server between a user device and a target website. A proxy can be a cure to restraints on sending requests in bulk to a web server or search engine from a single IP address. Besides, proxies can help speed up website crawling.
To set up proxies, go to the ‘Proxy’ tab and choose the way you want to set up a proxy:
- Manually by clicking on the ‘Enter manually‘ button located on the right side or using Ctrl+D hotkey. Add a list of proxies to the opened window. Each proxy should start from a new row.
Input format: Host:Port or Host:Port:Login:Password
- Using the table. Click on the ‘Add row‘ button or use the Ctrl+N hotkey to add a new proxy.
Keep in mind that:
- The only supported proxy IP-address format that can be set in the ‘Host or IP‘ field is IPv4.
- The ‘Port‘ field has 80 as the default value.
- The ‘Status Code‘ field displays a status code and describes a proxy status. So, the status code of the proxy shows whether it’s ready for use or not. The most common status codes:
- 200 OK means that a proxy has access to the requested resource
- 403 Forbidden – there is no access to a proxy and authentication can’t change it
- 407 Proxy Authentication Required – a proxy requires authentication or entered login and password are incorrect.
- The ‘Response Time‘ field shows the time it takes for a target service to respond via a proxy.
There are free and paid proxies across the internet, but we want to point out paid ones. Paid proxies are worth their salt because:
- You can choose the proxy specification (speed, response time, anonymization, etc.).
- You have slight chances to get a ban from websites.
- You can choose the necessary region without worrying that it will be ‘dead‘ soon.
- You can reach out to customer service in case of trouble.
Bottom Line
So slow websites can also be crawled. Netpeak Spider has a bunch of settings to adjust the crawling process to the real capacities of your website. If you know that a crawled website has limitations, tune the crawling beforehand. But if you find issues when the crawling process has started, pause it, go to the settings and try to sort it out. You can finish crawling blissfully if you:
- Restrict the crawling area.
- Reduce the number of threads and set a delay between requests.
- Skip crawling of images and PDF files.
- Disable rendering of JavaScript.
- Set the maximum number of crawled URLs.
- Use proxies – especially when you know that the website uses protection against crawlers.